
Renovating an old home often means tackling worn-out tile joints filled with cracked, stained, or moldy grout. While traditional grout can deteriorate over decades, epoxy grout sealant offers a robust, waterproof solution that restores beauty and functionality to historic spaces. CUALI’s two-tube epoxy grout sealant is specially formulated for challenging projects, combining ease of use with unmatched durability. In this guide, we’ll walk you through cleaning, filling, and leveling tile joints in old homes using epoxy grout sealant, ensuring results that last for years.
Why Epoxy Grout Sealant is Ideal for Old Homes
Old homes often have unique challenges: uneven floors, fragile tiles, or decades of grout buildup. CUALI’s two-tube epoxy grout sealant addresses these issues with:
•Superior Adhesion: Bonds to aged tiles and substrates.
•Waterproofing: Protects against moisture damage in basements, bathrooms, or kitchens.
•Flexibility: Accommodates slight structural shifts common in older buildings.
•Mold Resistance: Prevents regrowth in damp areas.
Tools You’ll Need
1.CUALI Two-Tube Epoxy Grout Sealant Cartridge
2.400ml 1:1 Dual-Chamber Caulking Gun
3.Static Mixing Nozzles
4.Grout Removal Tool or Oscillating Tool
5.Stiff-Bristle Brush & Vacuum
6.Plastic Scraper & Leveling Tool
7.Utility Knife or Grout Shaver
8.Protective Gear (gloves, goggles, mask)
Step 1: Assess & Prepare the Existing Grout
A. Inspect the Old Grout
Check for:
•Cracks or Gaps: Entry points for water and pests.
•Mold or Stains: Indicates moisture issues.
•Loose Grout: Tap gently—hollow sounds mean poor adhesion.
B. Decide: Repair or Replace?
•Partial Damage: Remove only compromised sections of old grout.
•Extensive Damage: Strip all old grout for a uniform finish with epoxy grout sealant.
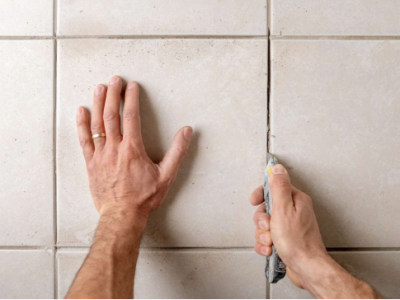
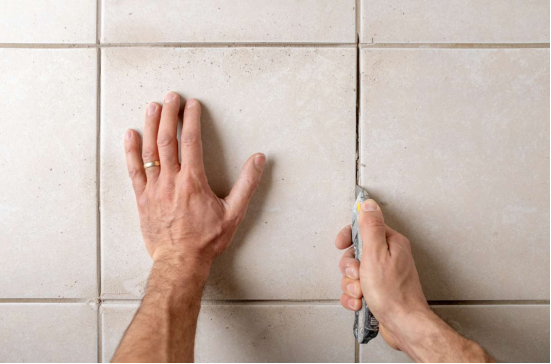
Step 2: Remove Old Grout
A. Clear Debris
1.Use a stiff-bristle brush to scrub loose particles from joints.
2.Vacuum dust and debris to expose clean edges.
B. Grout Removal Techniques
•Hand Tools: A grout saw or chisel works for small areas.
•Power Tools: An oscillating multitool with a grout blade speeds up large projects.
Pro Tip: Work slowly to avoid chipping delicate tiles common in older homes.
Step 3: Deep Clean the Tile Joints
Old grout lines often harbor grease, soap scum, or mildew. Proper cleaning ensures the epoxy grout sealant adheres securely.
1.Apply a Grout Cleaner: Use a pH-neutral cleaner to avoid damaging historic tiles.
2.Scrub with a Brush: Focus on stubborn stains in corners or edges.
3.Rinse & Dry: Wipe with a damp cloth and let joints dry for 24–48 hours.
Warning: Skip bleach—it leaves residues that weaken epoxy grout sealant adhesion.
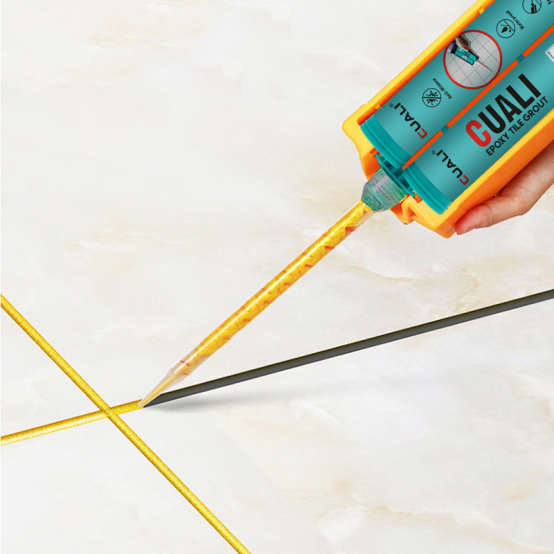
Step 4: Load & Prime the Epoxy Grout Sealant
1.Insert the Cartridge: Place CUALI’s two-tube epoxy grout sealant into the caulking gun.
2.Attach the Mixing Nozzle: Twist it tightly onto the cartridge.
3.Prime the Nozzle: Squeeze the gun until the epoxy grout sealant flows uniformly, discarding the first 5–10ml.
Critical Step: Proper priming ensures resin and hardener mix thoroughly.
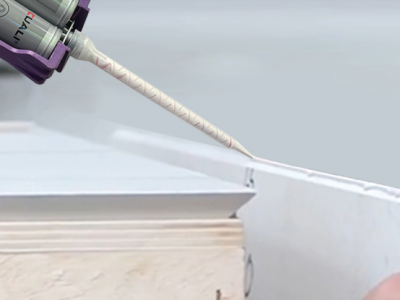
Step 5: Fill Joints with Epoxy Grout Sealant
1.Angle the Nozzle: Hold the caulking gun at 45° and slowly inject the epoxy grout sealant into joints.
2.Overfill Slightly: Ensure sealant sits slightly above the tile surface for easier leveling.
3.Work in Small Sections: Focus on 2x2 ft areas to prevent premature hardening.
Pro Tip: For narrow joints, use a grout bag for precision.
Step 6: Level the Epoxy Grout Sealant
1.Press with a Plastic Scraper: Drag the tool diagonally across tiles to compact the epoxy grout sealant into joints.
2.Smooth with a Sealing Ball: Glide a dampened sealing ball along joints to create a concave, crack-resistant finish.
3.Remove Excess: Wipe residual sealant with a dry cloth before it hardens.
Timing: Level within 90 minutes of application (check product guidelines).
Step 7: Cure & Finish
1.Initial Cure: Let the epoxy grout sealant set for 6–8 hours (extend to 12 hours in cold/humid conditions).
2.Remove Stray Sealant: Use a utility knife to shave off dried excess.
3.Final Cure: Wait 48 hours before exposing to water or heavy use.
Why CUALI’s Epoxy Grout Sealant Excels in Old Homes
1.Heritage-Safe Formula: Low-VOC and gentle on vintage tiles.
2.Color Matching: Choose from 50+ shades to blend with historic aesthetics.
3.Long-Term Durability: Resists cracking even in settling foundations.
Common Pitfalls & Fixes
• Problem: Sealant pulls out of joints during leveling.
Fix: Apply more epoxy grout sealant and press firmly with a scraper.
• Problem: Uneven color after curing.
Fix: Ensure thorough mixing by priming the nozzle and working in small sections.
• Problem: Sealant won’t adhere to old tiles.
Fix: Clean joints with isopropyl alcohol to remove invisible residues.
FAQs About Epoxy Grout Sealant in Old Homes
Q: Can epoxy grout sealant be used on original 1920s tiles?
A: Yes! CUALI’s epoxy grout sealant is safe for historic ceramic, porcelain, or encaustic tiles.
Q: How long does epoxy grout sealant last in old homes?
A: Up to 15+ years with proper application—far longer than cement grout.
Q: Is epoxy grout sealant reversible for future restorations?
A: While durable, it can be removed with specialized tools if needed.
Conclusion: Revive Old Tile Joints with CUALI’s Expertise
Old homes deserve solutions that honor their history while ensuring modern performance. CUALI’s two-tube epoxy grout sealant bridges the gap, offering waterproofing, durability, and aesthetic flexibility for tile joints that stand the test of time. By following this guide, you’ll transform crumbling grout into a resilient, beautiful feature that enhances your home’s legacy.
Ready to restore your vintage tiles? Explore CUALI’s epoxy grout sealant collection today—where heritage meets innovation.