
Applying epoxy grout sealant is essential for protecting tile joints from moisture, stains, and wear. CUALI’s two-tube epoxy grout sealant simplifies the process with its premixed resin and hardener formula, designed for hassle-free application using a caulking gun. This guide will walk you through the entire process, ensuring professional results even for first-time DIYers.
Why Choose CUALI’s Two-Tube Epoxy Grout Sealant?
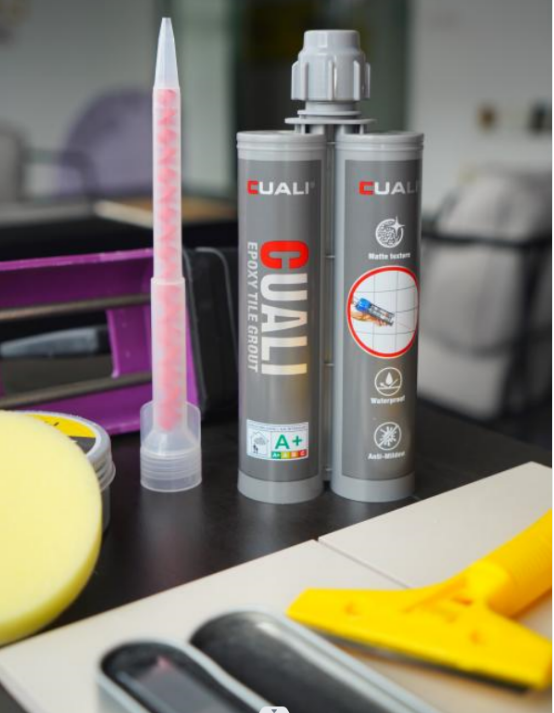
CUALI’s epoxy grout sealant stands out for its:
•Premixed Convenience: Resin and hardener are pre-loaded in separate tubes, eliminating manual mixing errors.
•Waterproof & Mold-Proof: Ideal for bathrooms, kitchens, and pools.
•Stain Resistance: Repels oils, chemicals, and spills.
•Durability: Withstands heavy foot traffic and temperature changes.
Tools & Materials You’ll Need
1.CUALI Two-Tube Epoxy Grout Sealant Cartridge
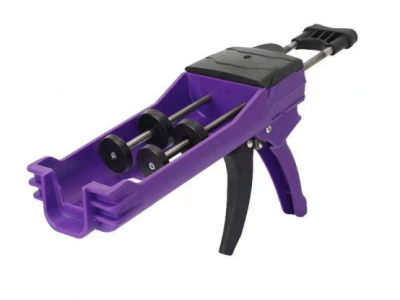
2.1:1 Dual-Cartridge Caulking Gun (compatible with two-tube designs)
3.Mixing Nozzle (included with the epoxy grout sealant)
4.Plastic Scraper or Leveling Tool
5.Shaver or Utility Knife (for excess removal)
6.Wax or Painter’s Tape (optional, for matte tiles)
7.Stiff-Bristle Brush or Vacuum
Step 1: Prepare the Surface
A. Clean the Tile Joints
1.Remove old grout, dirt, or debris using a stiff brush or vacuum.
2.Wipe tiles with a damp cloth and mild detergent to eliminate grease or residue.
3.Let the surface dry completely (24–48 hours).
Pro Tip: Moisture compromises adhesion—ensure joints are bone-dry before applying epoxy grout sealant.
B. Protect Adjacent Surfaces
Use wax or painter’s tape to mask off edges of glossy or porous tiles.
Step 2: Load the Epoxy Grout Sealant Cartridge
1.Insert Cartridge into Caulking Gun:
•Place the two-tube epoxy grout sealant cartridge into the dual-chamber caulking gun.
2.Attach the Mixing Nozzle:
•Screw the provided mixing nozzle tightly onto the cartridge.
Step 3: Prime the Epoxy Grout Sealant
1. Discard the First 5–10ml:
•Squeeze the caulking gun trigger until the epoxy grout sealant flows evenly from the nozzle.
•This ensures the resin and hardener are fully mixed.
2. Test Consistency:
•Check that the epoxy grout sealant has a uniform color and texture.
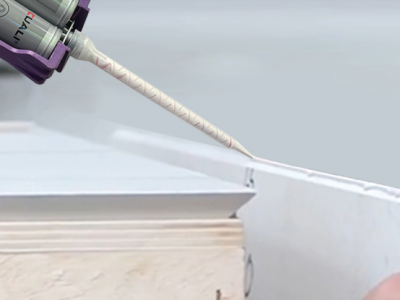
Step 4: Apply the Epoxy Grout Sealant
1. Fill the Joints:
•Hold the caulking gun at a 45° angle and slowly squeeze the trigger to inject the epoxy grout sealant into the tile joints.
•Work in small sections (3x3 ft) to maintain control.
2. Overfill Slightly:
•Ensure the sealant sits slightly above the tile surface for easier leveling.
Pro Tip: Move the nozzle steadily along the joint to avoid gaps or air bubbles.

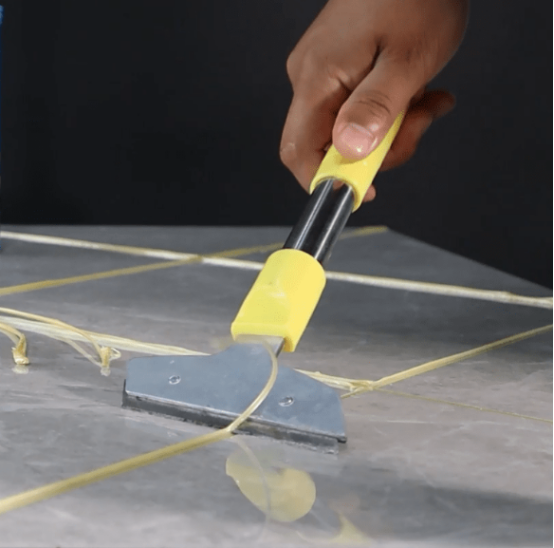
Step 5: Level the Epoxy Grout Sealant
1. Smooth with a Leveling Tool:
•Immediately after applying, use a plastic scraper or leveling tool to press the epoxy grout sealant into the joints and remove excess.
•Work diagonally across the tiles for even distribution.
Critical Timing: Level the epoxy grout sealant within 90 minutes of application (check product guidelines).
Step 6: Cure the Epoxy Grout Sealant
1. Initial Setting:
•Let the epoxy grout sealant harden for 6–8 hours (10–12 hours in cold or humid conditions).
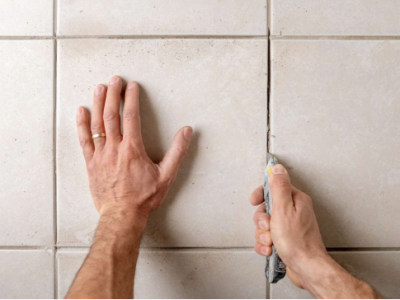
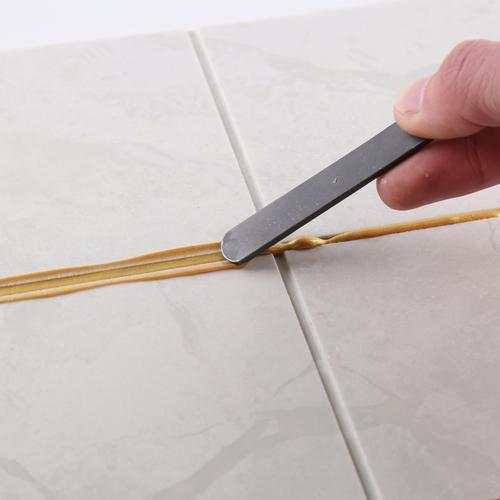
Step 7: Remove Excess Epoxy Grout Sealant
1. Scrape Off Residue:
•After curing, use a shaver or utility knife to carefully remove dried epoxy grout sealant from tile edges.
2. Full Cure:
•Avoid water exposure or heavy use for 24–48 hours.
Why CUALI’s Two-Tube Epoxy Grout Sealant is a Game-Changer
1. No Manual Mixing:
•Premixed resin and hardener ensure perfect consistency every time.
2. Time-Saving Design:
•The caulking gun allows precise, mess-free application.
3. 10+ Year Lifespan:
•Outperforms traditional grout in durability and stain resistance.
Common Mistakes to Avoid
•Skipping the Priming Step: Discarding the first 5–10ml of epoxy grout sealant is critical for proper mixing.
•Delaying Leveling: Epoxy grout sealant hardens quickly—work in small sections.
•Ignoring Temperature: Cold weather slows curing; allow extra time in winter.
FAQs About Two-Tube Epoxy Grout Sealant
Q: Can I reuse leftover epoxy grout sealant?
A: Yes—if the two-tube epoxy grout sealant is not being used up, keep the nozzle on the two-tube epoxy grout sealant. Until next time use it, change a new nozzle and do the discard process again, suggest to finish the leftover within one month after open. Store unopened cartridges in a cool, dry place.
Q: Is a caulking gun mandatory for application?
A: Yes! The 1:1 dual-chamber caulking gun ensures even mixing and pressure for CUALI’s two-tube epoxy grout sealant.
Q: How do I clean the nozzle after use?
A: No need to clean the nozzle after use, it is consumable. One epoxy grout sealant will come along with one nozzle.
Conclusion: Achieve Professional Results with CUALI
With CUALI’s two-tube epoxy grout sealant and this beginner-friendly guide, you can confidently seal tile joints like a pro. The caulking gun system eliminates guesswork, while the epoxy’s durability ensures your tiles stay pristine for years.
Ready to start? Explore CUALI’s epoxy grout sealant range today—your tiles deserve perfection!